How to implement Google FCM Push Notification in Android Application
Introduction:

What is Firebase Cloud Messaging (FCM)?
Firebase Cloud Messaging (FCM) is a cross-platform messaging solution that lets you reliably send messages at no cost.
Using FCM, you can notify a client app that a new email or other data is available to sync. You can send notification messages to the user so that you can retain your user and keep them engaged. For use cases such as instant messaging, a message can transfer a payload of up to 4KB to a client app.
Why we need FCM?
You have developed an app, you want to send some information to your audience, you wonder how will you deliver them? Here FCM comes in picture. Google introduced Firebase Cloud Messaging (FCM) which is a free tool/platform that will help you send Push Notification to Android apps. All modern app uses FCM to send the notification to their audience, it's a great feature to integrate with your app to make it more premium.
Below is the self-explanatory diagram, how FCM works in the background. Or you can visit the official FCM website for a better understanding.

- First, we need to create your project in console.firebase.google.com by providing your project name, application id, and some more information. Below is the step by step instructions.
- Click on "+" to add your project

- Give your project name, for example, I have given "Test Application". You can use any name you wish to add, it does not have any dependency with your application.

- You can choose to enable or disable Google Analytics with the toggle button, it is recommended to enable Google Analytics so you can get real-time statistics of your app.

- Select "Default Account for Firebase" to create your project.

- Once your project is added in the console you will see your project over there. Click on your project.

- Now select the Android, as we are integration with the Android app.

- Now, this is easy but The most important step, be careful while you fill out this information.
- Enter your app package name (you can find it in build.gradle file).
- Enter your application nickname(this can be anything, optional but it recommended to choose an easily relatable nickname).
- Debug signing certificate SHA-1 (optional), you can leave it empty.

- Once you have registered your app, you will get a "google-service.json", download it, and place it under the "app" folder/package. Click on next.

- In the next step, you will get some Gradle dependency information, save it somewhere we will need it later.

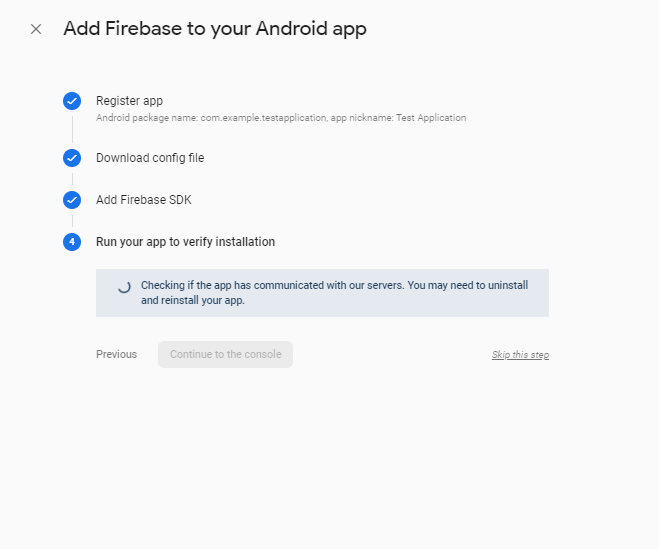
- In the final step, it will try to run your app to verify installation, you can skip this step, we will verify and test our app later.
Project-level build.gradle (<project>/build.gradle):
buildscript {
repositories {
// Check that you have the following line (if not, add it):
google()
}
dependencies {
...
// Add this line
classpath 'com.google.gms:google-services:4.3.3'
}
}
allprojects {
...
repositories {
// Check that you have the following line (if not, add it):
google()
...
}
}
App-level build.gradle (<project>/<app-module>/build.gradle):
apply plugin: 'com.android.application'
// Add this line
apply plugin: 'com.google.gms.google-services'
dependencies {
// add the Firebase SDK for
Google Analytics
implementation 'com.google.firebase:firebase-analytics:17.2.2'
// if you don't only want fcm
service then comment the above line and use only this one
implementation 'com.google.firebase:firebase-messaging:20.1.7'
}
Finally, Click 'Sync now' in the bar that appears in the IDE, now the setup is completely done.


- Create a service class that extends "FirebaseMessagingService", and add it to the Android Manifest file, as mentionedbelow.
<service android:name=".MyFirebaseMessagingService">
    <intent-filter>
        <action android:name="com.google.firebase.INSTANCE_ID_EVENT" />
        <action android:name="com.google.firebase.MESSAGING_EVENT" />
    </intent-filter>
</service>
public class MyFirebaseMessagingService extends FirebaseMessagingService {
@Override public void onNewToken(@NonNull String fcmId) { super.onNewToken(fcmId);
//This is fcmId,use this id to send notification to users. Log.d("FCM ID: ",fcmId); }
@Override public void onMessageReceived(@NonNull RemoteMessage remoteMessage) { super.onMessageReceived(remoteMessage);
//This is data which we have received from the FCM. Log.d("Data: ",remoteMessage.toString());//Get data payload from FCM and show as Notification to users NotificationCompat.Builder notificationBuilder =new NotificationCompat.Builder(this, "channel_id").setContentTitle(remoteMessage.getNotification().getTitle())
.setContentText(remoteMessage.getNotification().getBody())//Set your own icon here.setSmallIcon(R.drawable.common_google_signin_btn_icon_dark)
.setAutoCancel(true);
NotificationManager notificationManager =(NotificationManager) getSystemService(Context.NOTIFICATION_SERVICE); notificationManager.notify(0, notificationBuilder.build());} }
- onNewToken(String fcmId):
- When the app gets uninstall/install.
- When the app data gets cleared.
- When the app is moved.restored to new device.
- onMessageReceived(RemoteMessage remoteMessage):
- Go to the Firebase Console and select your project.
- Choose Cloud Messaging from the left side menu, you will find it under "Grow" section and select "Send your first message".

- You will get the below screen, just fill the information and click on "Send test message", it prompt to enter FCM Token, just enter your Token and click on "Test". That's it you will receive a push notification in your app.


That's amazing informative post, I want to add one more thing, If you want to make your web visitor to your subscriber then you should definitely check gravitec lifetime deal Best push notification for website ever.
ReplyDelete